今天发现某网站在chrome的dev tool里面没法用jquery调试,原因未知。搜了下发现重新导入一下jquery就可以。
1 | var importJs=document.createElement('script') //在页面新建一个script标签 |
今天发现某网站在chrome的dev tool里面没法用jquery调试,原因未知。搜了下发现重新导入一下jquery就可以。
1 | var importJs=document.createElement('script') //在页面新建一个script标签 |
-s Squeeze multiple occurrences of the characters listed in the last operand (either string1 or string2) in the input into a single instance of the character. This occurs after all deletion and translation is completed.
我自己的理解:“针对参数中的最后一个字符集(只有一个字符集参数时就是string1,有两个字符集参数时就是string2)的每个字母,如果出现多个连续的就只保留一个。这个操作在转换和删除操作完成之后进行。
1 | $ echo 'baaabccc'|tr -d 'ac' |
| Command | Scope | Common use cases |
|---|---|---|
git reset |
Commit-level | Discard commits in a private branch or throw away uncommited changes |
git reset |
File-level | Unstage a file |
git checkout |
Commit-level | Switch between branches or inspect old snapshots |
git checkout |
File-level | Discard changes in the working directory |
git revert |
Commit-level | Undo commits in a public branch |
git revert |
File-level | (N/A) |
git reset to alter the staged snapshot and/or the working directory by passing it one of the following flags:
--soft – The staged snapshot and working directory are not altered in any way.--mixed – The staged snapshot is updated to match the specified commit, but the working directory is not affected. This is the default option.--hard – The staged snapshot and the working directory are both updated to match the specified commit.一个比较好的学习postgres的站点
http://www.postgresqltutorial.com
显示当前连接数
1 | select sum(numbackends) FROM pg_stat_database; |
1 | --切换数据库 |
1 | -- Firstly, remove PRIMARY KEY attribute of former PRIMARY KEY |
1 | create sequence <table_name_primary_id_seq>; |
导出insert语句
1 | pg_dump --column-inserts --data-only -d <database> -t <table> > ./export.sql |
计算百分比
1 | select count(*) as item,(count(*)::decimal / (select count(*) from <table>)::decimal) * 100 as percent |
postgis应用
http://www.gonjay.com/blog/2015/05/15/postgis-cha-xun-fu-jin-de-ren/
今天折腾了下用iptables中转流量的事情,先把命令记录在这里,以后再来精简
首先开启ip转发(在中转服务器上面操作)
net.ipv4.ip_forward=1$ sudo sysctl -p使修改文件后设置生效$ sudo sysctl -w net.ipv4.ip_forward=1,重启后无效echo "1" > /proc/sys/net/ipv4/ip_forward,这种直接修改内核方式重启后无效流量中转,在中转服务器上执行下面规则
1 | sudo iptables -t nat -A PREROUTING -p tcp --dport 中转端口 -j DNAT --to-destination 目标服务器:目标端口 |
ipsec vpn服务器需要中转500,4500两个端口的udp流量
情景:只对某一个ip开放端口,其他ip访问此端口拒绝
1 | iptables -A INPUT -s 开放的ip -p tcp --dport 端口 -j ACCEPT |
关于这两条的执行顺序,容易弄混。经测试发现,一定要先ACCEPT这个ip,再DROP掉其他ip,才能达到预期效果。
Each rule in a chain contains the specification of which packets it matches. It may also contain a target (used for extensions) or verdict (one of the built-in decisions). As a packet traverses a chain, each rule in turn is examined. If a rule does not match the packet, the packet is passed to the next rule. If a rule does match the packet, the rule takes the action indicated by the target/verdict, which may result in the packet being allowed to continue along the chain or it may not
可以理解一下为:按顺序匹配,只要匹配中一条就采用这一条。不再往下匹配。以此例,如果先DROP,就不会有ACCEPT了。
1 | ~ #正则匹配,区分大小写 |
从nginx配置上防止恶意请求
HttpLimitReqModule配置来限制ip在同一时间段的访问次数来防cc攻击。
HttpLimitConnModul用来限制单个ip的并发连接数
网友总结 nginx文档
https://www.nginx.com/blog/rate-limiting-nginx/
http://blog.nkhost.net/notes/nginx-limit-the-request-processing-rate/
1 | http{ |
ab -n 1000 -c 50 http://testweb.com/index.html #1000个请求,50个并发测试
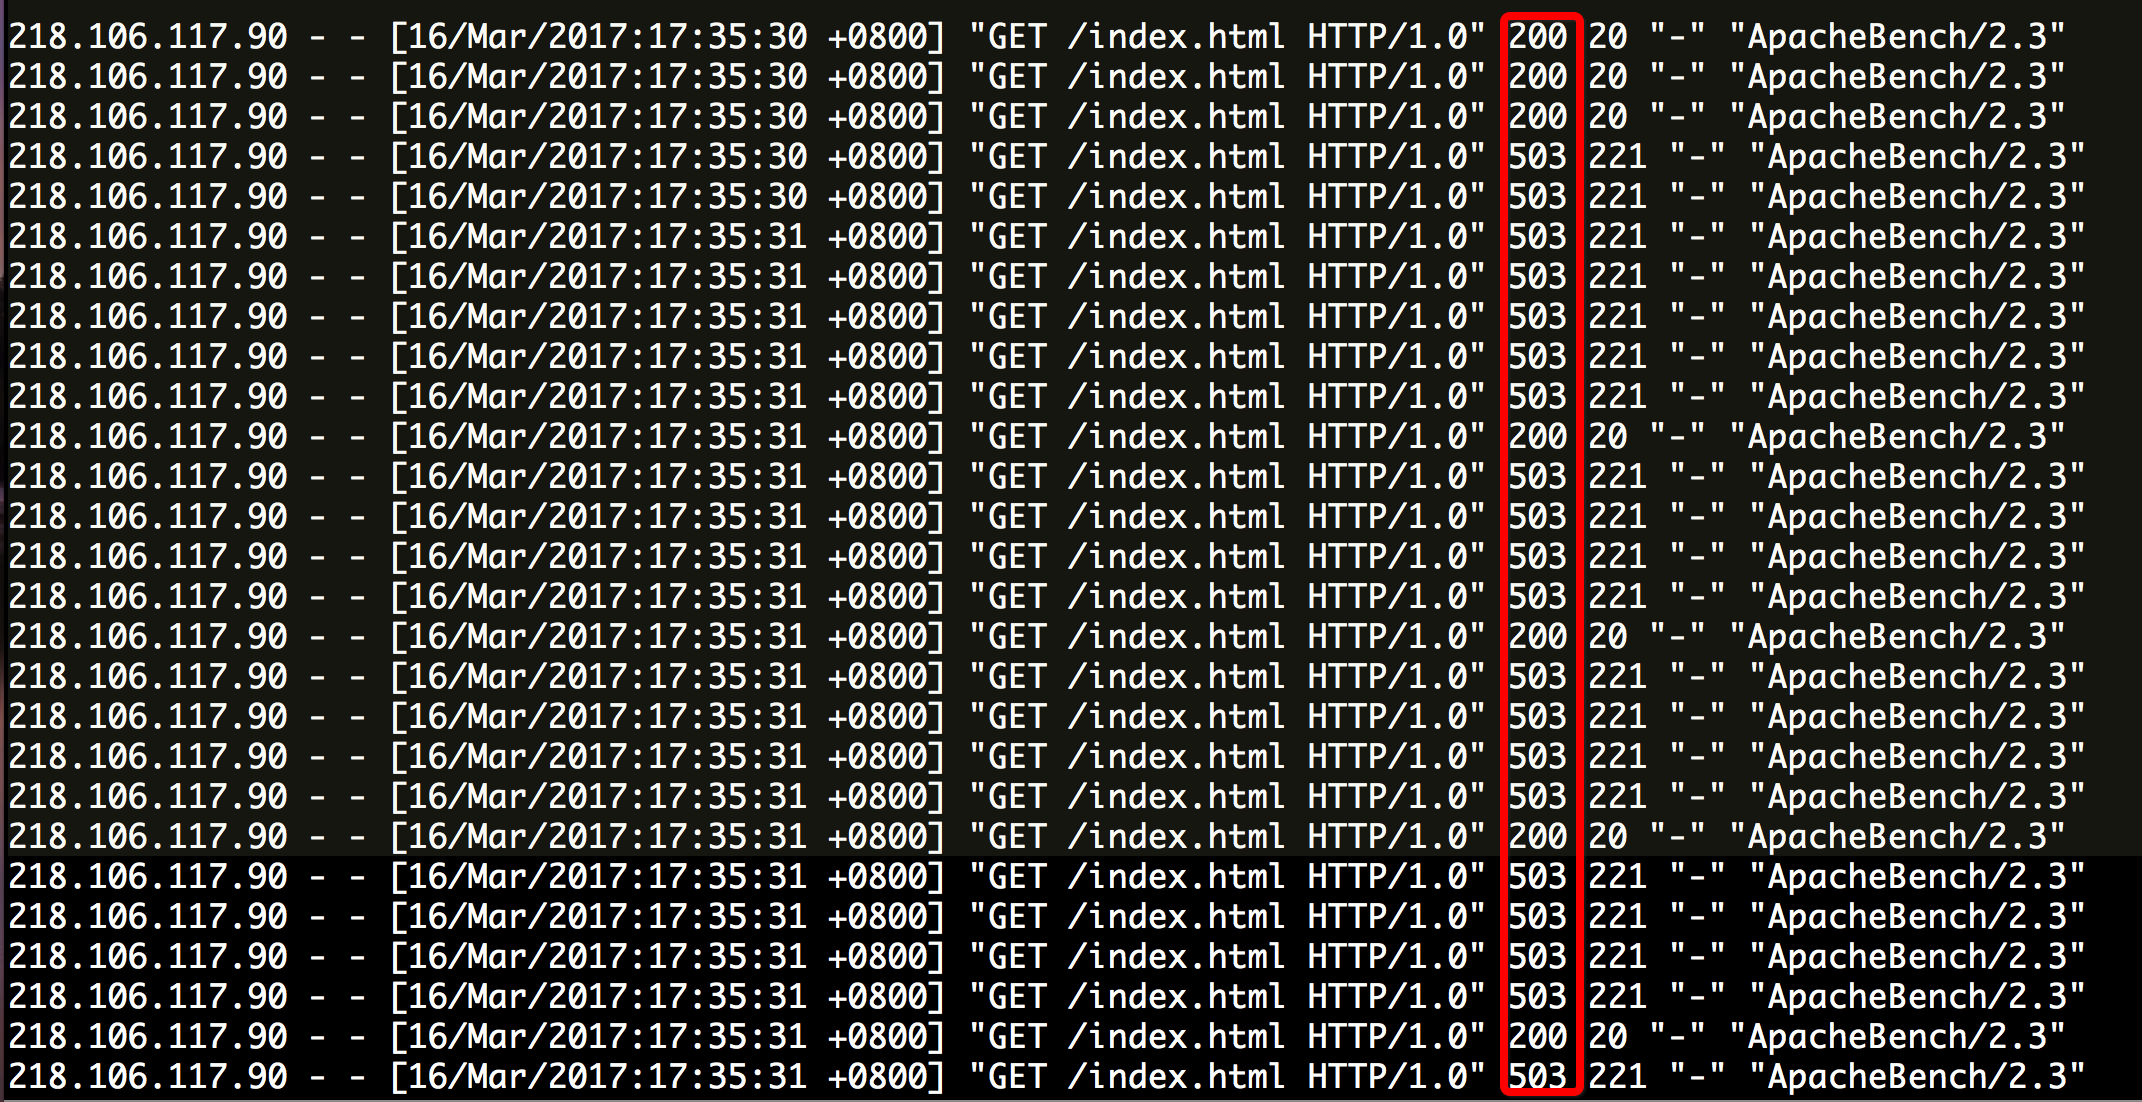
观察nginx访问日志可以看到,很快就限制返回503了
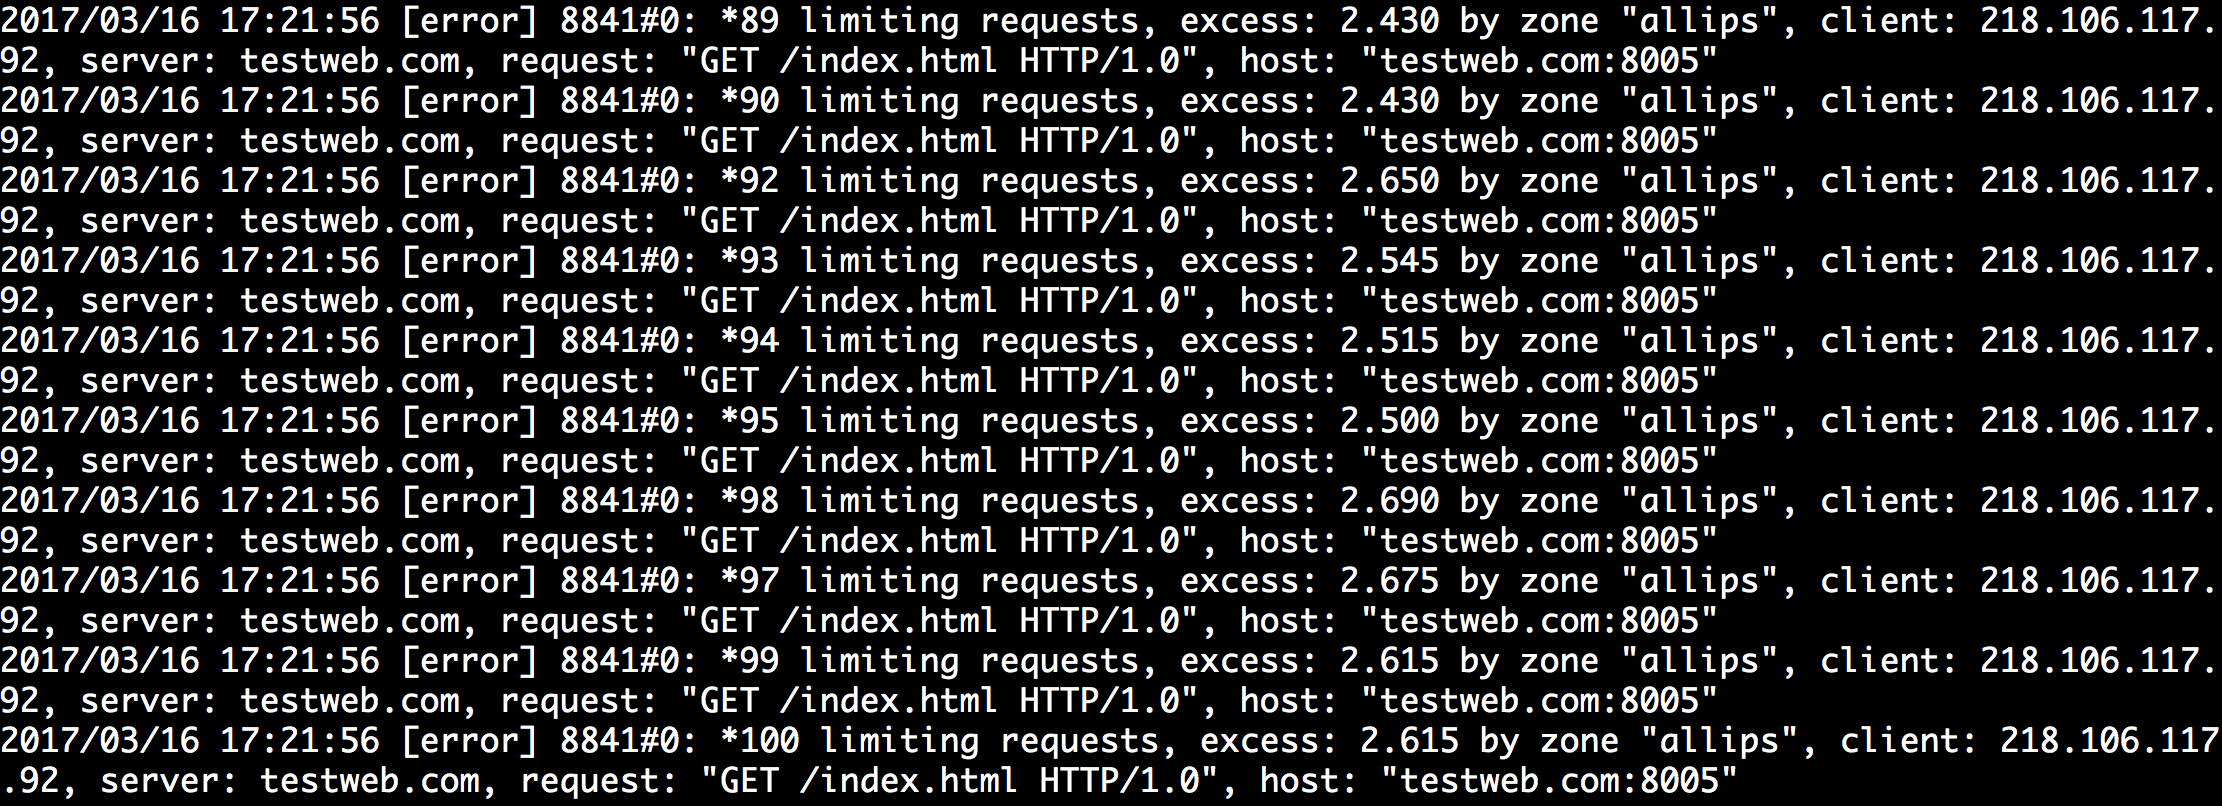
观察nginx error日志可以看到请求受限
云服务器会统计5xx错误,5xx错误可能引发报警。有时需要把这种错误自定义,例如把这种503自定义成403错误。http错误码
nginx配置 stackoverflow
1 | limit_req zone=allips burst=2 nodelay; |
自定义错误返回页 stackoverflow
1 | error_page 403 /403.html; |
在webapi项目中,想用json返回错误提示,并且状态码设为200 github
1 | limit_req zone=allips burst=2 nodelay; |
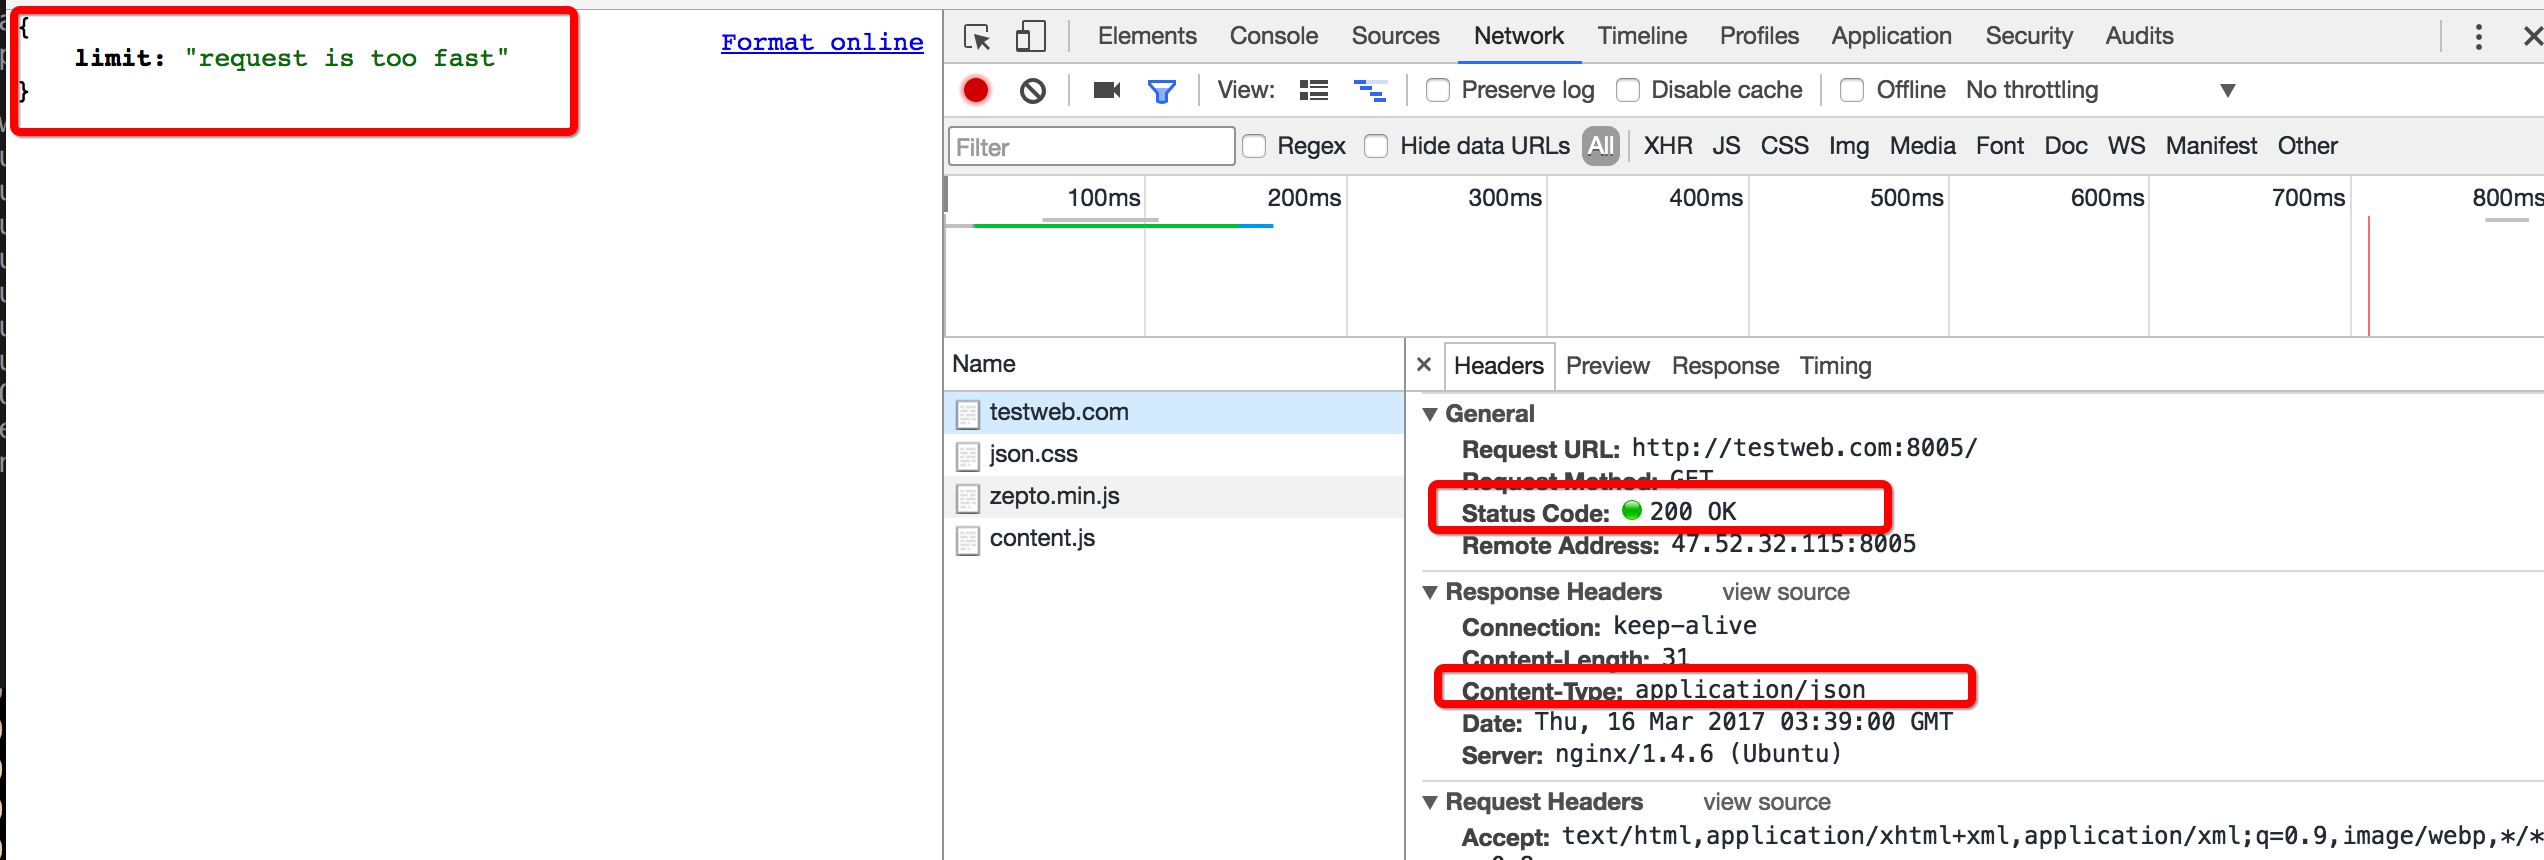
先用ab命令发起并发请求,引发连接限制。同时访问可以发现,服务器返回json格式数据,同时状态码200
镜像 容器 仓库 参考链接
1 | cd dockerfile所在目录 |
1 | docker run -p [ip:]hostPort:containerPort image_name |
常用
1 | -i: 以交互模式运行容器,通常与 -t 同时使用; |
使用镜像nginx:latest以交互模式启动一个容器,在容器内执行/bin/bash命令
1 | docker run -it nginx:latest /bin/bash |
1 | docker ps #列出正在运行的容器 |
container_id_or_name: 如果是id可以只取前面几位,能区分就好,如果用name就要全称
1 | docker cp /data/tmp/test.txt container:/data/tmp |
1 | docker commit -m "message" -a "author" container_id_or_name new_image_name |